

Gardening in January?! Yes! Here’s an enjoyable way to start seeds in January in the comfort of your own home. It’s called winter sowing and this method of starting seeds provides the perfect growing environment for certain flowers and vegetables. It’s an easy way to start seeds because once planted, nature looks after the rest - no grow lights, heat mats or constant attention from you is needed. There is also the bonus of not needing to harden off plants in the spring before transplanting as the seedlings are already growing outside.
The most common objection I hear from people about winter sowing is how cold it is. Don’t worry about the cold, seeds freeze in nature all the time and you are going to offer them a cozy microclimate too. In spite of that, it is important to choose your seeds wisely though to ensure success with winter sowing. Not all seeds will germinate this way but there are some seeds that flourish with a cold January start. There are many varieties of flowers and vegetables that prefer cool growing conditions or need stratification (a cold period) before they’ll germinate. For flowers your best bets are; bachelor buttons, snapdragons, yarrow, sweet peas, delphinium, larkspur, nigella, sweet william, ammi. For vegetables try: lettuces, kale, bok choy, spinach, radishes, broccoli, and herbs like dill or mint.
Here’s what you need…
A container that can hold soil and is transparent, scissors or sharp knife, duct tape, potting soil, screwdriver, a plant tag, and of course seeds.
Let's get this party started…

Choose a container that is fairly large and it needs to be transparent. Think apple cider jug, vinegar jug, large pop or water bottle, clamshell from fruit or lettuce.

Poke holes with the screwdriver in the bottom. Remove the lid if it has one (this allows the heat to escape and for moisture to enter. If you are using a clam shell make sure there are holes in the lid.

About ⅓ of the way up the jug - cut around the jug on 3 sides only. Leave one side attached. The attached part acts like a hinge to open and close your mini greenhouse.

Fill the bottom of the jug with damp soil. About 3 inches
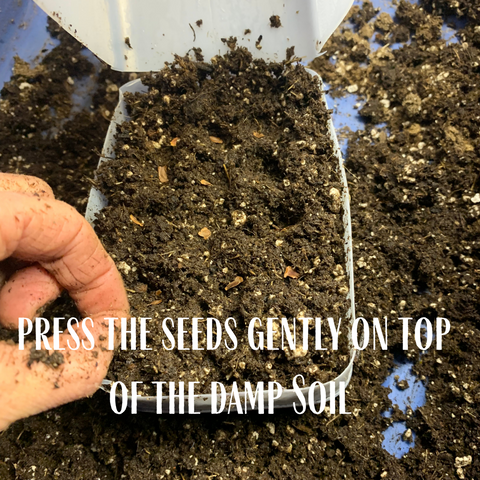
Sprinkle the seeds on top of the soil. If the seeds are small, gently press them into the soil. For the larger seeds gently cover them with a bit of the damp soil.

Put the milk jug back together and tape it up and then put those babies outside!

Place your container outside in a sunny but protected place (sheltered from the wind). Not against your house or under eaves. Be sure to remove the cap from the jug.
Check in on the jugs every once in a while. You want to make sure the containers don’t overheat or dry out. If they are dry when you check on them - very carefully drip some water through the hole in the top (you need to be careful you don’t wash away the seeds. Better still, if there’s snow on the ground grab a handful and push it in through the vent.
Don’t be discouraged if it looks like nothing is happening. Be patient. These seeds will go through several freeze thaw cycles before they germinate.

Once you see your seedlings have sprouted and spring approaches - you will need to pay more attention to them. You will need to add more holes for ventilation - on a nice sunny day in March or April it is going to heat up quickly in the jug and you don’t want to fry your seedlings. As they grow even bigger you can fully open the container during the day and close back up at night.
Transplant the seedlings into bigger containers or right into your garden once the soil can be worked. If you planted greens or herbs you can cut and consume right from your mini jug greenhouse.
What are you going to winter sow?
Are you interested in learning more about seeds and the best methods for germination? If so, we’re going to be hosting some seed starting workshops in April, as well as one especially for kids. Stay Tuned for all the details in the coming weeks.